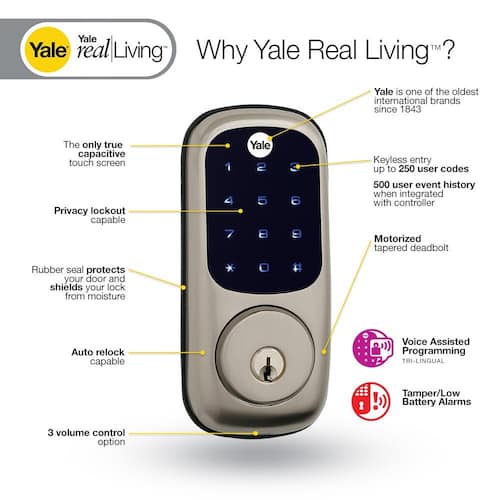
The Yale Real Living Touchscreen Deadbolt comes with very elegant design, an intuitive touchscreen operation, wireless connectivity, voice features and some very cutting-edge capabilities.
The lock comes with a variety of features and personalised settings for multiple users ensuring that the top-level security is thus maintained. The lock also offers some of the very handy features.
Once you have completed the manual installation [Read: How to install the Yale Real Living Touchscreen Deadbolt?] and ensured that all the fittings are in the right place, go through the following videos step wise in order to explore all the features of Yale Real Living TouchScreen Deadbolt.
Setting Up the Master Pin Code for the Lock
Programming the User Pin Code registeration
Deleting the User Pin Code
Setting Up the Auto Re-lock feature
Operate the Inside Indicator Light
Programming the One-Touch Locking feature
Programming the Privacy Button feature
Programming the Advanced Lock Settings
Programming the Volume Settings
Programming the Language Setting Mode
Programming the All Code Lock-Out Mode
Programming the Network Module Setting
Now, you will be completely aware of all the features of your Yale Real Living Touchscreen Deadbolt. As said earlier, the good thing about this feature-rich lock from Yale is that it come with a separate wireless module that extends the functionality of the lock and its control operations over wireless commands.
The Yale Real Living Deadbolt is compatible with other third-party devices like the Samsung SmartThings and controlled via the SmartThings App. [Read: How to integrate Yale Real Living Touchscreen Deadbolt with SmartThings?]