
Source:PCMac
If you’ve just got your LIFX bulbs want to know go ahead with installing them in your home, here’s your startup guide. Don’t worry. Installing LIFX bulb and configuring them to work with your tablet/smartphone is an extremely simple process, and you’ll be done in less than two minutes.
Step 1: First Download the LIFX app on your Android/iOS/Windows device. The links are placed below. Download the LIFX app for your smartphone platform. LIFX app is currently supported only on Google Play, App Store and Windows.


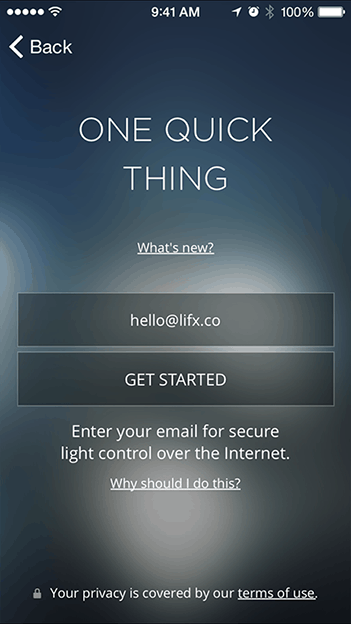
Step 2: Once you start using the app for the first time, click on “Get Started”, and enter your email address.
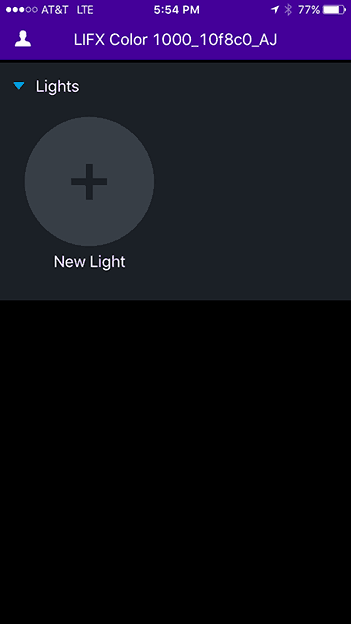
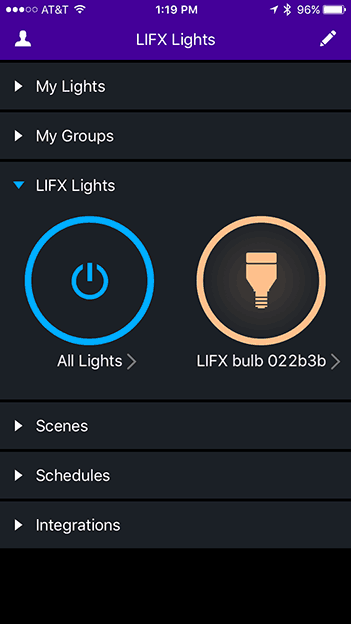
Step 2: On creating the account, the app will navigate you to a new screen. Tap Add Bulbs:
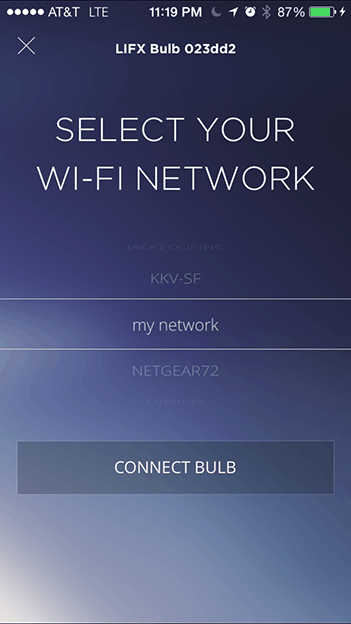
Step 3: Turn on the bulbs, and the follow the instructions in the set-up screen. For this you need to:
- Leave the LIFX app and go to your phone Settings–>Wi-Fi and select the LIFX Bulb Network
- If your LIFX Network is called as LIFX Bulb, you need to enter lifx1234 as your password to get connected. However, you will not need to add any password for LIFX bulbs with latest firmware.
- After this you can navigate to the LIFX app or the or a dropdown by the LIFX app will help you take back to the app.
After waiting for a few seconds, the app will show you the available Wi-Fi networks. Choose your home Wi-Fi network where you will be asked to enter your Wi-Fi password.
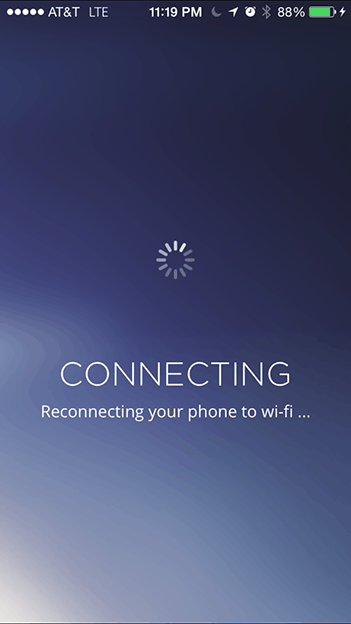
The app can take some time to get connected, so we request you to be a bit patient here. After this reconnect to your Wi-Fi and see the bulb.
Step 4: You’re done with installing LIFX bulb in your home.
For now, you’re just done with the basic setup. Feel free to play around and explore the features. For advanced setup on how to create scenes, schedules and integrations, check out our guide on solar schedules.